How to Create a Font in Adobe Illustrator
If you're a designer or illustrator who's comfortable creating glyphs in Adobe Illustrator, this tutorial is right up your alley! You'll learn how to create your own font in Illustrator by planning out a letter set, go over ways to refine the font design, and prepare files for use in a font-making program, all from the comfort of Adobe Illustrator.
In this tutorial, you'll learn how to make a font. This will teach you how to make your own font in Illustrator and create simple and fun fonts that can be sold as digital assets on Envato Market. You won't need a font creator plugin for Illustrator here. Just check out the market's font category for inspiration for your personal designs.
This is part one of two tutorials on how to create a font in Illustrator. In the next tutorial, we'll create a custom font with our vector letterforms.
Follow along with us over on our Envato Tuts+ YouTube channel:
What You Will Learn in This Adobe Illustrator Tutorial
Designing a font from scratch using your own handwriting
How to make a custom font using Image Trace
How to create a font in Illustrator by converting an image into a vector
How to organise your letters into layers and a grid
How to refine your letters and symbols using different brushes and tools
Let's get started!
1. How to Sketch Out Your Letters
1.
Step 1
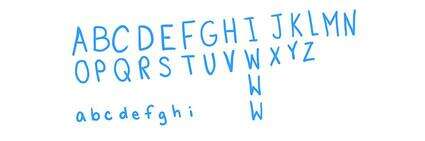
In this section we'll learn how to design your own font in Illustrator and start designing a font from scratch. Whether you're drawing out letters in a digital art program like Adobe Photoshop, Paint Tool SAI, Krita, or something else, or drawing out your lettering on paper, I like to start with an alphabet quickly drawn in whatever style I want my font to have. Note the differences in the 'w's seen below. Consider how your letters relate to one another.
Step 2
An option to keep your drawn letters from being a mess is to use grid lines in a drawing program like Adobe Photoshop. You can create a Grid Layout if you wish, or place grid lines manually. This allows you to keep track of the height and width of each letterform in an informal setting.
Step 3
You can also scan in drawn or written letterforms and adjust the Threshold (Image > Adjustments > Threshold) so your image is a clean, black and white image, ready for importing into Adobe Illustrator. This is entirely optional, as you can also just draw your font freehand in Adobe Illustrator itself or import your image without adjusting it in Adobe Photoshop. This is important as you learn how to make a custom font. In the next section, we'll learn how to make a font in Illustrator.
2. How to Prepare Your Letters and Illustrator Document
2.
Step 1
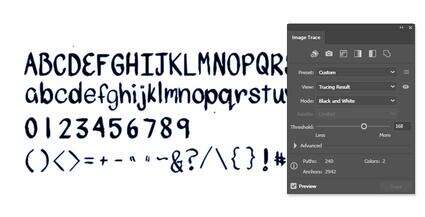
Now we'll learn how to make a font in Illustrator. Before we launch into creating vector versions of our letterforms, I like to prepare my imported image file. I'm using lettering I drew in Adobe Photoshop. Open the jpeg in Adobe Illustrator. In the Image Trace panel, consider the following settings (yours may differ):
Preset: Custom
View: Tracing Result
Mode: Black and White
Threshold: 168
Hit Trace (this happens automatically if you're enabled Preview) and your drawing will instantly be traced as a vector image.
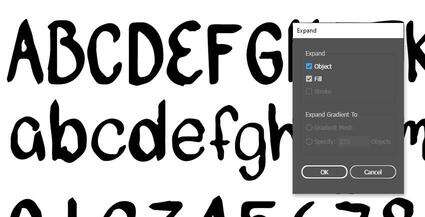
Step 2
Select your newly traced image and go to Object > Expand. This will expand your traced image into vector objects. Ungroup the objects and use the Magic Wand Tool (W) to select the white-filled objects. Delete these so you're only left with the black letterforms.
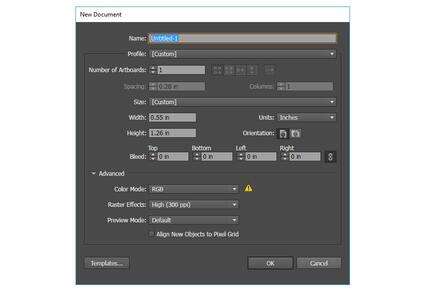
Step 3
Create a New Document. Mine is sized to my best guess for how big I want the largest of my letterforms to be: 0.55 in by 1.26 in. You can choose the right file size for your needs, of course.
3. How to Organize Your Letterforms
3.
Step 1
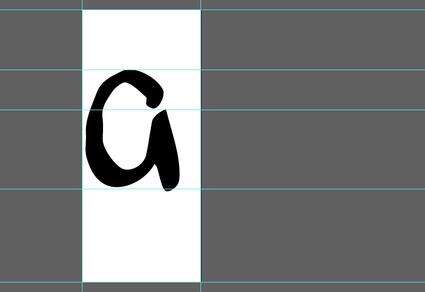
Now we'll continue learning how to create your own font in Illustrator. In your New Document, import or Paste (Control-V) your letterform group. Ungroup them so you have complete control over each object. I added Grid lines over my Artboard to help define the limits of each part in my letterform set. The lines will define the highest and lowest points of uppercase and lowercase letters.
Place your first letter object on your Artboard. You'll want to make sure that if it doesn't have any descenders (like the letters p, g, j, and y have), you'll want to place it at the baseline indicated by your gridline.
Scale and adjust your letterform within your gridlines and Artboard as you see fit.
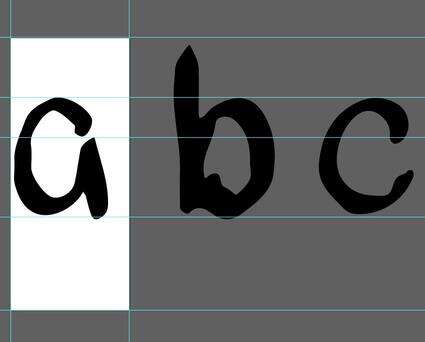
Step 2
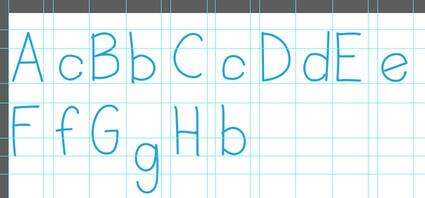
Some letters are similar in size, shape, and overall design. I tend to use the lowercase 'b' as 'd's, 'p's, and 'q's as well. Also note how your letters compare from lowercase to uppercase. I'll be redrawing everything in the next section of this tutorial, so how your letterforms relate to each other will be entirely up to you. Make notes about changes you'd like to make at this point, before we refine letters.
Step 3
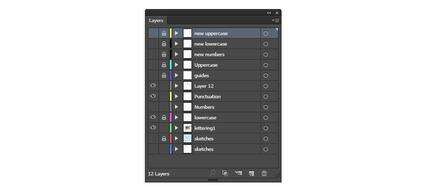
Each glyph type (lowercase, uppercase, punctuation, and numbers) is placed on the Artboard in turn and then organized into its category's corresponding layer within the Layers panel. As I refine each letter, new objects will be placed into their corresponding layer.
Creating a font can be a big project, so the more organized you are, the easier it will be.
Step 4
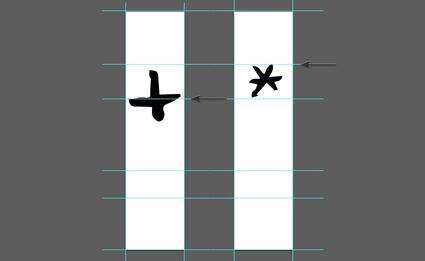
The size and placement of punctuation and special characters are up to you. Numbers will likely be around the size of your uppercase letters, but punctuation needs to fit with both lowercase and uppercase letters. Note the arrows below. I've placed my asterisk at the highest point of my font forms, while for now my plus sign sits closer to the midpoint.
Experimenting with your letter and glyph objects will inform you of your most desirable punctuation placement. Play around with your objects until you find an arrangement you like!
4. How to Refine Your Letterforms
4.
Step 1
In this section, we'll learn different ways to design a font using the Brush Tool. Let's start with four different ways to refine your letterforms.
First we have done nothing at all. This is what my 's' would look like if I left the traced image as my letterform. It's choppy but has its own strange charm.
This next letterform is what happens after I used the Shape Tool. It's cleaned up and smoother, but not nearly as smooth as the other letterforms below.
This third one has been traced with the Pencil Tool (N). Set your Fidelity to Smooth and outline your letterforms as you see fit!
Finally, this is the result of the Blob Brush Tool (Shift-B). You can also get a similar effect with the Brush Tool (B). Both allow for pressure-enabled line work.
If you opt for the Blob Brush Tool, you'll create font Illustrator objects as each letterform. If you opt for the Brush Tool, you'll be creating paths that you can change with various brushes. I'll be using a custom brush, created next, and the Brush Tool.

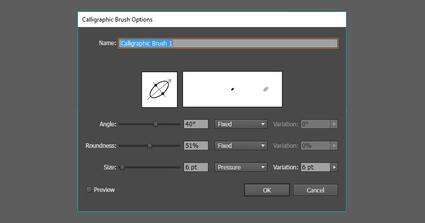
Step 2
My custom brush is a Calligraphic Brush with the following options:
Angle: 40°
Roundness: 51%
Size: 6 pt, Pressure Variation: 6 pt
Please note that I'm using a pressure-sensitive graphics tablet. The Pen Tool (P) is likely a better option if you're using a mouse or something other than a stylus for drawing.
Step 3
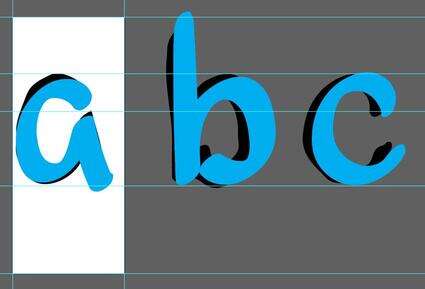
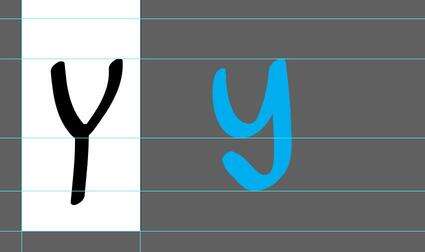
In this step, you'll learn how to how to design a font. Time to redraw and refine your letterforms! On a layer above your letter category (these are lowercase), set each letter as visible, one at a time, and draw over them. My custom brush keeps the look of my letters as though they were drawn with a chiseled marker. Use like characters to influence the look of others. All four of the characters below were drawn from the 'b' that I drew.
Place each letter above the next, hiding those you're not working on at the moment in the Layers panel.
Step 4
For some letters, I've changed their overall design after working through the alphabet. I've also made sure that descenders hit the same line, below the baseline, and lowercase letters that aren't l, h, t, or k don't go past the top line of the other lowercase letters.
As ever, it's entirely up to you whether or not your letterforms follow these rules. Have fun with your creations, and use the drawing tools you like most within Adobe Illustrator!
Step 5
Refine special characters and punctuation as well. My pound sign (or hashtag) was a bit too large and lanky for the style of the rest of my characters. As such, I redrew it with the Brush Tool so it's smaller and chubbier overall.

5. How to Prepare Your Characters for the Font
5.
Step 1
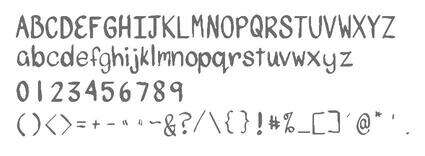
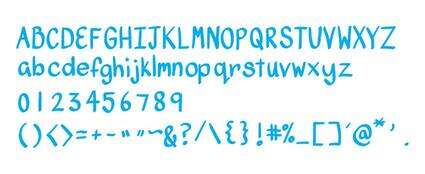
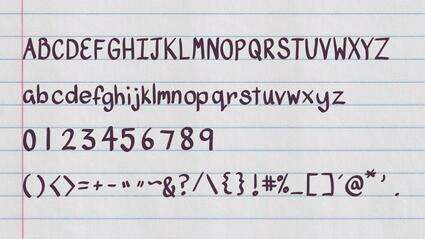
In this section, we'll learn the first steps of moving from vector to font. Let's start with the final versions of all 89 of my characters for this font. At this point, I've done the following:
Made sure each letter fits into the same space and uses the same gridlines for reference.
Refined every single character I want to be a part of the final typeface.
Organized all of my characters into easily accessible layers within the Layers panel.
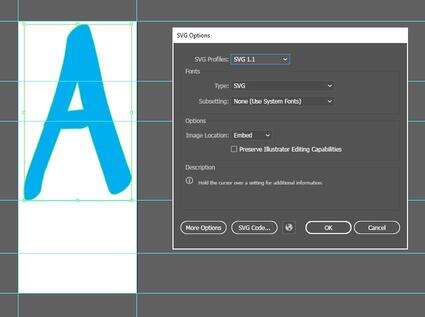
Step 2
If you're going to export the content to another program, you'll need to save each and every glyph as its own SVG file. I've kept the default settings for saving SVG files and have simply made sure that there are 89 files organized by character name in a folder once I'm done. This is how you create a font in Illustrator.
Step 3
For each SVG file, I've also done the following to make sure my file sizes are as small as possible:
All of my brush paths have been Expanded into Objects.
Objects and layers that are not visible (anything but the current character) have been deleted from each SVG file.
Object paths have been United in the Pathfinder panel, Made into a Compound Shape, and then Expanded as their own path or compound path.
These steps, though a bit tedious, took my file size down from 800kb to 1kb or less. From here your files are ready to be imported into your font-making program of choice.

Great Job, You're Done!
Now that you know how to design your own font in Illustrator and you've created all 89, or so, of your typeface characters, you're ready to jump on over to part two of this tutorial: font creation, where you'll learn the next steps of moving from vector to font! We'll explore options for in-app font creation using font creator plugin for Illustrator with a purchased script, exporting the character set into apps like Font Forge, and more! Share your font character creation below, and join me in the second part of this tutorial.
You may also want to check out our useful guide to the major font trends of 2020.
Top 5 Handwritten Fonts
Vezthisory - Handwritten Font (TTF, OTF, WOFF)
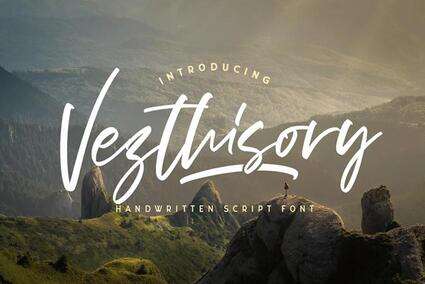
Vezthisory is an elegant script font that is made with a digital pen stroke. The font would be perfect for a luxury fashion brand, wedding invitations, and logos. It features both uppercase and lowercase letters, numbers, and punctuation, and works on both PC and Mac.
Capslock Handwritten Font (TTF, OTF, WOFF)
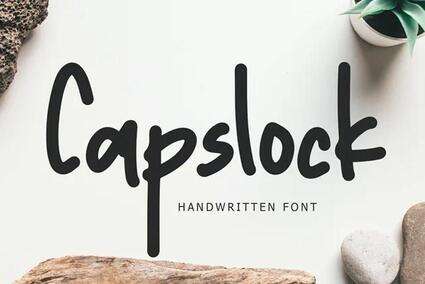
Capslock is a playful handwritten font that is perfect to use for logos, social media posts, product design or any other project. It features web fonts and works on both PC and Mac.
Hopkins Angela - Handwritten Font (TTF, OTF, WOFF)
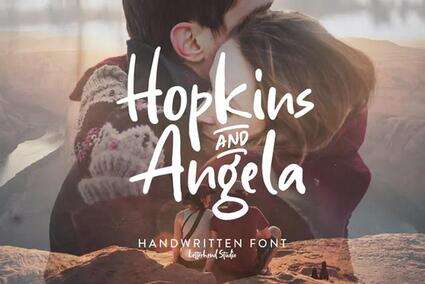
Hopkins and Angela is a casual handwritten font that gives your project a personal touch. It features both uppercase and lowercase letters, numbers, and punctuation. This font is perfect for logos, invitations, magazines, wedding cards and branding.
Rebelia | Vintage Typeface (TTF, OTF)
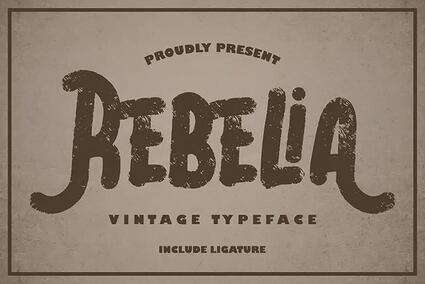
Rebelia is a vintage style font that features tons of glyphs, alternates, and ligatures and works on both PC and Mac. This font is perfect for logos, posters, business cards, branding, and more!
Eather | Modern Grunge Typeface (TTF, OTF)
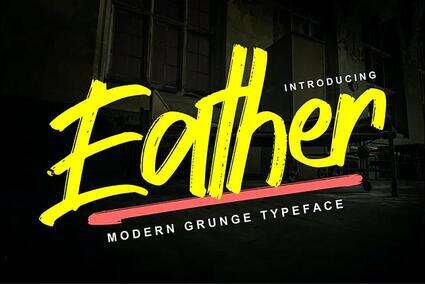
Eather | Modern Grunge Typeface is a modern grunge style typeface that features tons of glyphs, alternates and ligatures. It comes with multilingual support and works on both PC and Mac. This font is perfect for greeting cards, posters, branding, business cards, and more!
Looking to Learn More? Check Out Even More Font Tutorials Below!
Fonts
How to Make a Monospace Pixel Font
Miss Chatz
Text Effects
How to Create a Retro Chrome Text Effect in Adobe Illustrator
Andrei Marius
Adobe Illustrator
How to Create a Color Font With Adobe Illustrator and Fontself Maker
Yulia Sokolova
Text Effects
How to Create a Comic Book Text Effect in Illustrator
Andrei Marius
Typography
How to Create a Nautical Tattoo Font
Chris Carey